CHALLAH
yeild: 2 large braided loaves
2 packets of yeast
1/3 cup plus 3 tbspns white sugar
2 cups of water, separated
1/3 cup canola oil
1 tblspn salt
2 eggs, separate yolks from whites
7 cups bread flour
Optional: sprinkle toppings like kosher salt, poppy or sesame seeds
Instructions-
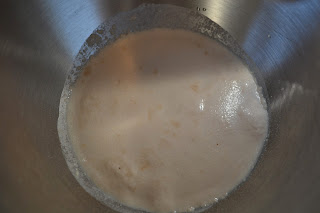
1. Warm 1 cup of water slightly (don't make it HOT just warm-- you can easily stick your finger in it) then add to the bowl of your stand mixer along with yeast and 3 tablespoons of sugar. Let sit for 20 minutes.
3. Mix using dough hook for a few minutes until a ball is formed and dough has pulled away from the sides of the bowl. You made need a little more flour so just watch during this step to make sure a distinct ball has formed. The dough should be sticky but shouldn't stick all over your hands when it's ready so add a little more flour if that happens. **If you aren't using a stand mixer, just knead on a floured surface until the dough is smooth and sticking together nicely-- this takes around 10 minutes.
4. Move your dough ball to a large "greased" bowl (sprayed with PAM or oiled) and cover with a WET towel or paper towels so that it doesn't stick to the dough.
5. Place in a warm location (in the winter I turn on the pre-heat for our oven for 2 minutes then turn it off and stick the bowl in there, otherwise in warmer weather I just leave it on the counter) and allow to rise for one hour.
6. Remove towel, punch down dough and re-cover and allow to rise for another hour.
7. Cut your dough in half. With each half, cut into 3 pieces and braid them together. Place both braids on a "greased" baking sheet. You can also braid with 4 or even strands-- go to YouTube to find instructions, I like this one.
8. Pre-heat oven to 365 degrees. Brush tops of braided dough with the egg whites and if you've chosen to use sprinkle-on toppings, this is when you put them onto the braids. :)
9. Bake for 25-30 minutes. Cool on a baking rack.
CUT & ENJOY!
I love to cut the bread and freeze slices for use as toast or croutons with soups or as panini sandwiches. It freezes and thaws out beautifully. This is really a perfect idea if you need to bring something to a family or friend gathering, large or small. My favorite dips to serve with challah are hummus and olive dip but just by itself, this challah is delicious.
Have a great weekend everyone :)


No comments:
Post a Comment